Steel parts may rust. We advise covering up when not in use.
Features:
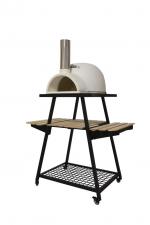
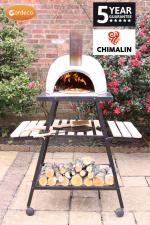
- Steel stand for the PIZZARO CHIMALIN AFC wood fired pizza oven
- Made of strong tubular steel
- Two folding side tables for accessories, pizzas or other utensils
- 4 lockable castors.
- Metal parts are black
Code: PO-STAND
Bar Code: 5031599044781
Product Size: 66cm length. 115cm width. 110cm height.
Material: Steel with Wooden shelves
Packaging Information: Brown box
Packing Size: 110cm length. 95cm width. 10cm height.
Country of origin: China
DO NOT FULLY TIGHTEN THE BOLTS BEFORE ASSEMBLING ALL THE PARTS
Assembly is easier with two people, one to hold the parts and a second person to insert the fix
ings. -s panner supplied
1. Layout and identify all the components. Do not tighten any fixings until the assembly is complete.
Please refer to diagram for positioning.
2. Loosely assemble the Square Tube (C) to Pre-assembled Stand (B) with four M6 x 45 bolts and
nuts (N1).
3. Assemble the Top Plate (A) to Pre-assembled Stand (B) with four M6 x 45 bolts and nuts (N1).
4. Put the stand upside down and attach the four castors (D) by screwing the castors into the screw
threaded hole on Pre-assmebled Stand (B).
5. Turn the stand right way up, assemble the Folding Bracket (E) to Pre-assembled Stand (B) with
four M6 x 40 bolts and nuts (N5).
6. Assemble the six Inside Wooden Slat (M) onto the middle steel bar on Pre-assembled stand (B)
with twelve M5 x 40mm bolts and nuts (N3).
7. Assemble the four Side Shelf Wooden Slat (G) on Folding Bracket (E) with eight M6 x 20 bolts
and nuts (N2).
8. Assemble the Round Corner Wooden Slat (H) on Folding Bracket (E) with four M6 x 20 bolts and
nuts (N2).
9. Attach the Bottom Grid (F) onto the Pre-assembled stand bottom bar by inserting the grid into
the holes on bar.
Now check and tighten all fixings, assembly is complete.
DO NOT OVER TIGHTEN THE FIXINGS
;)
;)
;)
;)
;)
;)
;)
 UK
UK